If you want to learn about What is SPFx Extension
Before exploring each Extensions in depth, let me explain little bit about the development and debugging experience.
Yeoman SPFx generator:
Like other SharePoint Framework customization component, you are going to use the Yeoman Generator to create Extensions.
Version 1.3 of the Yeoman generator and all subsequent versions include the project scaffolding templates and dependencies that you need to create and test SharePoint Framework Extensions.
Execution requires modern experience
Extensions need a live SharePoint site and a modern page to run.
Application Customizers
This will allows you to use arbitrary JavaScript’s on all pages or to access well knwon HTML element placeholders and put your custom rendering logic there. Microsoft wants to make it possible for you to change certain elements, such as the header and footer among others, in a supported manner.
In previous versions – if you are a SharePoint developer, you might have used or remember “delegate controls”. You can compare or think of Application Customizers as delegate controls for SPFx.
Currently, Application Customizers are supported at site, Web, and list scopes.
Let’s see how to write a simple Application Customizer.
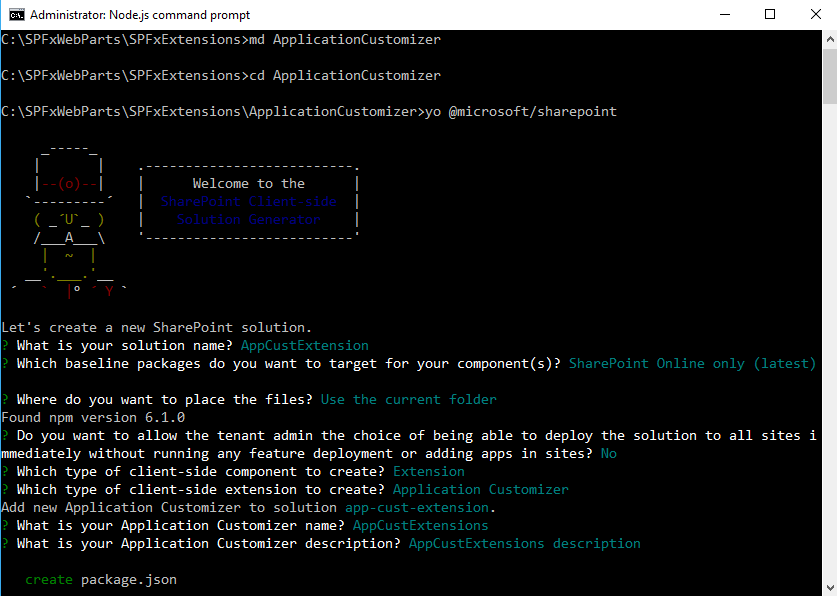
Create a new SPFx project using this command: yo @microsoft/sharepoint
Note: Here i am assuming you are familiar with how to use Node.JS to create a client side web part. If you want to learn how to create client side web part Click here.
This leads you through a wizard as below. Enter information as you want.
Once your project is created, type code . to open it in VS Code.
Once your project opens, go to the src\extensions folder and locate your customizer.
Your customizer should match the name you provided when creating the solution. Please refer above screen for detail. You should see a manifest.json file which describes to SharePoint the details of your customizer (In this sample,appCustExtensions). It should look like below:

In above screen, there is a GUID, the “id” field. That is an unique identifier for your customizer. Take a note of this GUID as we will need this later on.
Now, open the .ts file for your customizer. You can find it in the same folder as the manifest.json file. My .ts file can be seen as below:

You can see, an Application Customizer is simply a class that inherits from BaseApplicationCustomizer. Also note that our customizations go in the “OnInit” method and not the constructor. This is because the state of the customizer isn’t available in the constructor.
Debugging Startup – Option 1 – Manual Setup
The first option is more of a manual setup – you are going to first start the local web server but don’t launch the browser. Just launch the Web Server.
You are going to do that by saying
$ gulp serve –nobrowser
Access the following url:
https://xxx.sharepoint.com/sites/home/
loadSPFX=true&
debugManifestsFile=
https://localhost:4321/temp/manifests.js&
customActions={
“theGUIDOfYourCustomizer”:{
“location”:
“ClientSideExtension.ApplicationCustomizer”,
“properties”:
{“testMessage”:”Hello as property!”}}}
This query string tells SharePoint how to treat this debugging experience.
loadSPFX:
This is a flag that tells SharePoint to load the SharePoint Framework on the page. The SharePoint Framework is genuinely not added at every page in SharePoint unless there is a component that depends on the SharePoint Framework that’s been registered on the page. They do this for performance reasons. No need to add the JavaScript that supports SharePoint Framework if it is not needed on the page.
debugManifestsFile=https://localhost:4321/temp/manifests.js:
By default SharePoint Framework is only gonna look for Manifest file in the app catalog for things that we deployed and on the SharePoint servers for the system libraries.
What this debug manifests is going to do is – its going to tell SharePoint Framework where the local web server is and his manifest file. So they can fetch and know what the extensions are available to us and what should be loaded on the page.
And then the third section for this query string is gonna contain some specific information about our extension.
&customActions={“<COMPONENT_GUID>”:{“location”:”ClientSideExtension.ApplicationCustomizer”,”properties”:{“name”:”value”}}}
Now this is gonna differ for each type of an extensions. We look into what all options. Generally speaking its gonna tell the SharePoint Framework the id of the extension that can be loaded now or that should be loaded and tells where it supposed to go like should go into toolbar or context menu and allow some arbitrary properties as well.
Now in the browser – separate browser window – you gonna navigate to live SharePoint modern page or list in SharePoint site and you can add a special query string and then refresh the page.
Note that I’ve broken down the URL with return characters to make it easier to read. But it’s a URL, so write it in a single line. Also, the GUID mentioned above is the GUID from your manifest.json file.
Your browser should show you a dialog box, as

This disclaimer screen allows debug scripts to load, you’re effectively running them within the context of the page. It serves as a good warning to end-users not to load any random stuff from the Internet, while giving developers an easy way to inject and test their code. Go ahead and load debug scripts and verify that you can see the customization, as shown in below
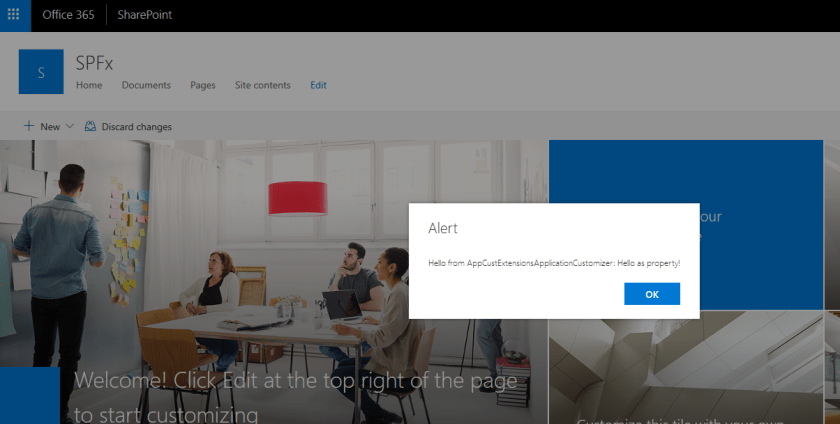
Using this technique, you can run any arbitrary JavaScript on the page.
In next post I will explain how to customize Customize your Modern Sites

2 comments